School-Age: The Scientific Method
For our last school-age program of the session, we did a program about The Scientific Method.
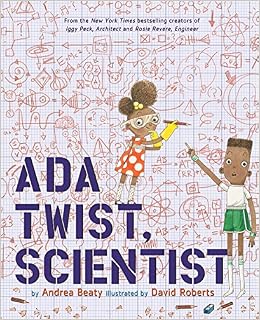
1. Reading
I shared one of the last nominees for our state's children's book awards, "Ada Twist, Scientist" by Andrea Beaty. It has a perfect rhythm to the text, the story was humorous, and both the text and the pictures were appealing to kids.
Also, I LOVE sharing books that remind kids that no matter their age, gender, or race, they can be whatever they want to be in life.
2. Discussion
We defined The Scientific Method in 6 simple steps. THEN, we broke down how Ada Twist did this throughout the book.
1. Observe something in your environment
Ada smelled something stinky!
2. Ask a question (about your observation)
Ada wanted to know what was causing the smell.
3. Make a hypothesis
A. Her first hypothesis was that her dad's cabbage stew was causing the smell.
B. Her second hypothesis was that the smell was caused by the cat!
4. Conduct the experiment
A. She smelled the cabbage stew and added ingredients to it, to see if it smelled better/worse.
B. She sprayed the cat with cologne and perfume since it did not smell on its own.
5. Conclusions from experiment
A. The smell was not from the cabbage stew.
B. The smell was not from the cat.
6. Report results
I explained that Ada didn't necessarily report her results in the book but that, if she were conducting a true scientific experiment, she would have reported those two conclusions she had learned.
3. Craft
Our library is closed on Friday, for Good Friday, so I only had one school-age program this week. I decided to do something a little messier than normal, knowing that we only had to do it for one program instead of replicating two days. SO, we made slime!
We had more kids than normal at our program because it was only on one day this week. I had my teens set up two of our folding tables and lay newspaper over top of them.
I went ahead and put the ingredients for the slime on the tables and, once we finished with our discussion, I allowed the kids to evenly distribute to both tables for our 'experiment'.
Materials needed:
A. Water
B. Elmer's Liquid Glue
C. Cornstarch
D. Large bowls
E. Spoons to stir ingredients
F. Small Dixie cups or other cups for measuring
The recipe I used said that it is a 1-1-1 ratio of the three ingredients. As we discovered, during our 'experiment', you actually required A LOT more cornstarch than that to make it thick like slime. BUT, that was all part of the fun!
I pre-measured all the ingredients to put out on the table and had the kids take turns adding the ingredients to the bowl. I designated one of the older kids to be our 'stirrers' so that we did not have ingredients tossed around the library.
The first thing you do is mix the glue and water together. It needs to be thoroughly mixed before you add the cornstarch. We used Popsicle sticks to scrape the glue out of our measuring cups, but all the other ingredients came out easily.
After the glue and water were mixed, the kids helped add the cornstarch. It was still very soupy, but luckily we had an extra box of cornstarch. We added a full box of cornstarch to each tables batch and they finally thickened up enough to be officially called slime.
I didn't want to go overboard and have the kids play with the slime with their hands in the library. I compromised and had my teen helpers distribute a bit of slime in individual plastic baggies for each kid. Once the kid had their bag of slime, they could decorate it as they wanted.
For slime decorations we had:
A. Food coloring
B. Glitter
C. Letter beads
D. Gems
Notes:
Yes, it was messy but it was still fun. I am glad I saved it for a week when we only offered one program because of how the week fell. That being said, the kids had a great time and the parents looked as though they were enjoying watching the chaos unfold. What a great way to end a program session before we take a break for April!
Comments
Post a Comment